


So, you’ve graduated from simple pod systems or cig-a-likes and are ready to step into the world of vape mods. Welcome! Vape mods offer unparalleled control over your vaping experience, allowing you to fine-tune everything from flavor intensity to cloud production. However, with great power comes great responsibility.
This guide will walk you through the essentials of using your new device safely and effectively, transforming that intimidating piece of tech in your hand into your perfect vaping companion.
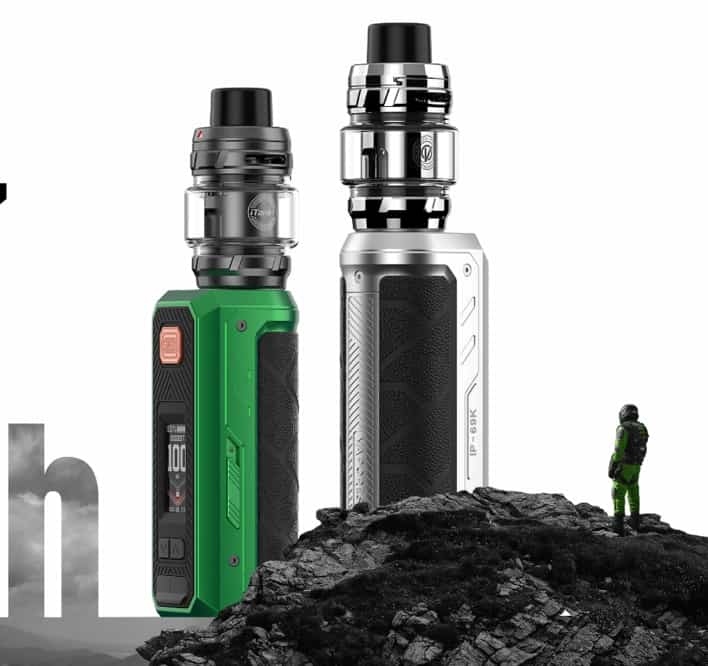
Step 1: Know Your Gear – Anatomy of a Vape Mod
Before you press the fire button, it’s crucial to understand the key components:
-
The Mod (Battery Compartment/Board): This is the main body. It houses the chipset, screen, and buttons, and powers the entire device. It can be powered by internal batteries or, more commonly, external 18650, 20700, or 21700 batteries.
-
The Tank: This is the clearomizer that holds your e-liquid. It consists of:
-
The Coil: The replaceable component that contains cotton and a heating wire. This is the heart of your vape and the part that needs regular replacement.
-
The Chimney: The tube that directs vapor from the coil to your mouth.
-
The Drip Tip: The mouthpiece.
-
-
The Buttons & Screen:
-
Fire Button: The main button you press to vaporize the e-liquid.
-
Adjustment Buttons (+/-): Used to change your wattage, temperature, or navigate menus.
-
Step 2: The Initial Setup – Getting Ready to Vape
1. Battery Safety (The Most Important Step):
-
If your mod uses external batteries, only use high-quality batteries from reputable brands (e.g., Molicel, Sony/Murata, Samsung, LG) purchased from trusted vendors.
-
Always inspect your battery wraps (the plastic coating) for any nicks, tears, or damage. Never use a damaged battery.
-
Insert them into the mod according to the polarity symbols (+ and -). Incorrect insertion can damage your mod.
2. Priming Your Coil:
A dry burn is the fastest way to ruin a new coil. Always prime it first.
-
Take your new coil and apply a few drops of e-liquid directly onto the cotton you can see through the side wicking ports.
-
Install the coil into the base of the tank and fill the tank with e-liquid.
-
Let the filled tank sit for 5-10 minutes to ensure the cotton is fully saturated.
3. Finding Your Sweet Spot: Wattage Control
Most beginners start in Wattage (Power) Mode. This is the most straightforward way to vape.
-
Check your coil! Every coil has a recommended wattage range printed on its side (e.g., “Best 50W-80W”).
-
Start Low: After priming, set your mod to the lowest end of that recommended range.
-
Gradually Increase: Take a few short puffs and gradually increase the wattage by 5 watts until you find a satisfying balance of flavor and vapor production that isn’t too hot or harsh.
Step 3: Mastering the Two Main Vaping Styles
Your device and coil choice will largely determine your vaping style:
-
Mouth-to-Lung (MTL): Similar to smoking a cigarette. You first draw the vapor into your mouth, then inhale it into your lungs. Uses higher-resistance coils and lower wattage (typically 10W-20W). Ideal for higher nicotine strengths and a tighter, more restricted draw.
-
Direct-to-Lung (DTL): Like breathing in air. You inhale the vapor directly into your lungs. Uses low-resistance coils and higher wattage (typically 40W+). Produces large clouds and is best for lower nicotine strengths and high-VG e-liquids.
Step 4: Advanced Features (Once You’re Comfortable)
After you’ve mastered basic wattage mode, you can explore:
-
Temperature Control (TC Mode): This mode allows you to set a maximum temperature for your coil (made of specific wires like Nickel Ni200, Titanium, or Stainless Steel). It prevents dry hits and provides a perfectly consistent vape. Never use TC mode with Kanthal or Nichrome coils.
-
Variable Voltage (VW): Similar to wattage mode, but you are controlling the voltage output instead. Wattage mode is generally preferred as it’s more consistent.
Essential Safety & Maintenance Tips
-
Clean Your Tank Regularly: When changing coils, disassemble your tank and rinse it with warm water (except the coil itself) to remove old e-liquid residue.
-
Keep It Upright: Prevent leaks by storing your mod upright, especially when the tank is full.
-
Charge Safely: If your mod has external batteries, use an external charger. It’s safer and more efficient than charging via the mod’s USB port. Never leave a charging mod unattended.
-
Listen to Your Device: If it’s getting excessively hot, making strange noises, or not firing correctly, stop using it immediately and investigate the issue.
Conclusion: Your Journey, Your Vape
Using a vape mod is a journey of personalization. Don’t be afraid to experiment with different coils, wattages, and e-liquids to discover what you enjoy most. Start slow, prioritize safety above all else, and you’ll unlock a rich and rewarding vaping experience that simple devices simply can’t match.