










Backing up your iPhone is one of the simplest yet most important steps you can take to protect your personal data. Whether you’re upgrading to a new iPhone, replacing a damaged device, or safeguarding against accidental data loss, having a recent backup ensures your photos, contacts, messages, apps, and settings can be restored quickly.
Apple offers several ways to back up an iPhone, including iCloud, Mac, and Windows PC. In this guide, we’ll explain each method and help you choose the one that best suits your needs.
Why Backing Up Your iPhone Matters
Your iPhone stores valuable information such as:
- Photos and videos
- Contacts
- Messages (iMessage and SMS)
- App data
- Device settings
- Notes
- Calendars
- Health and Fitness data
- Wi-Fi passwords
- Home screen layout
If your iPhone is lost, stolen, damaged, or reset, a backup allows you to recover most or all of this information.
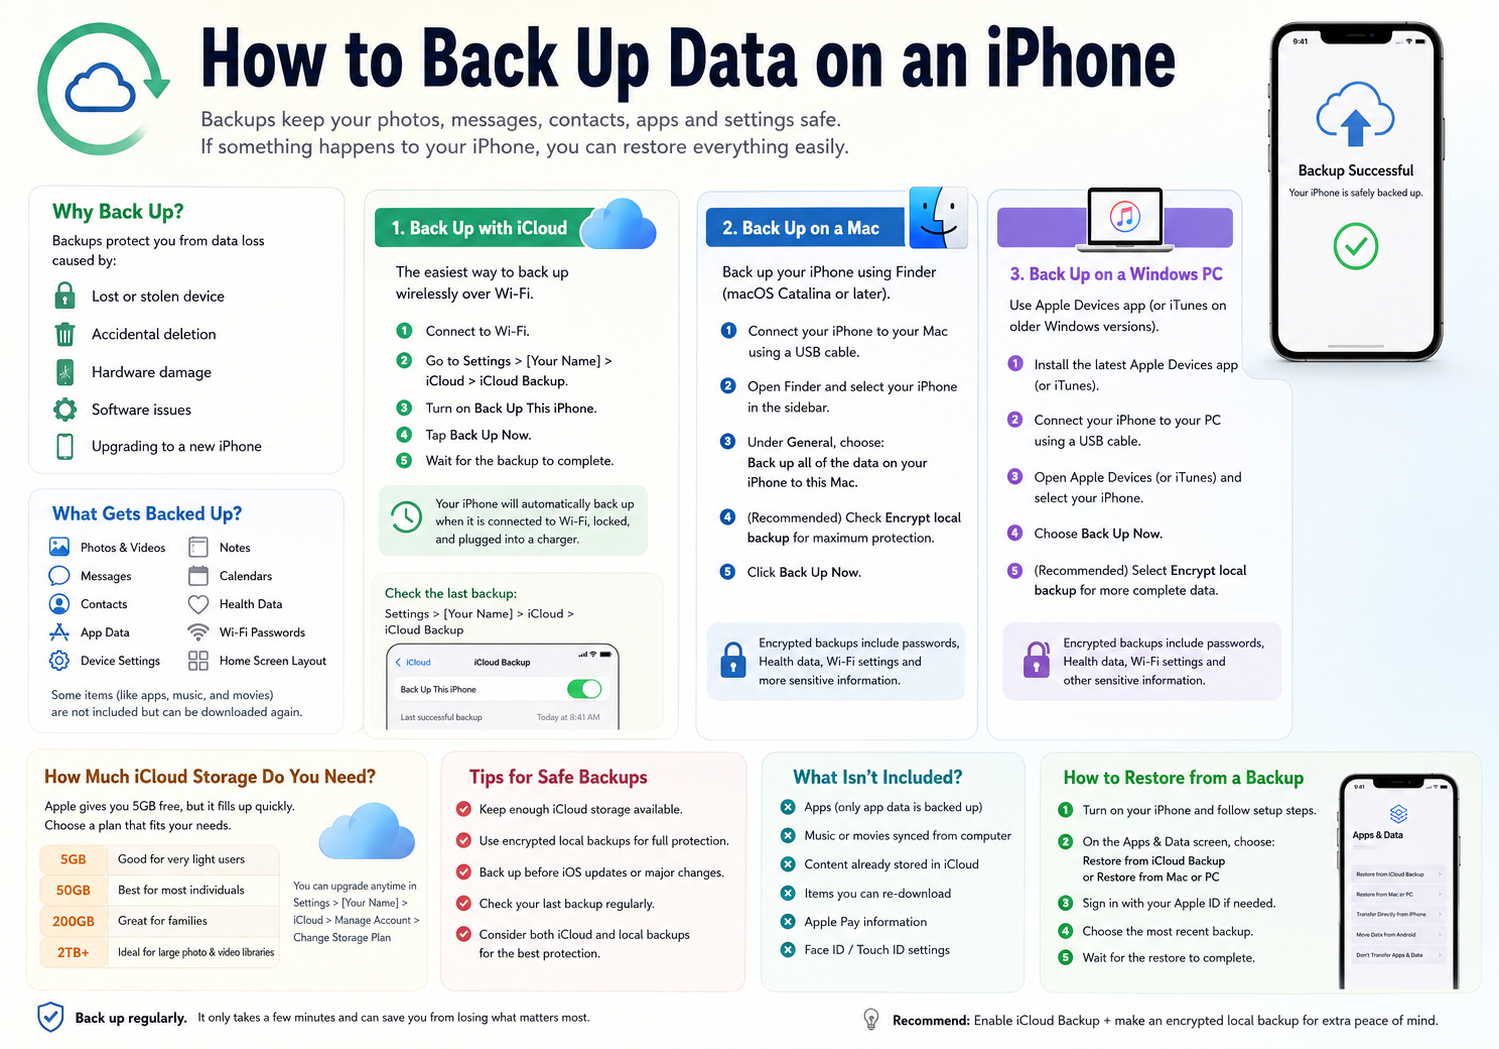
Method 1: Back Up Your iPhone Using iCloud
iCloud Backup is the easiest and most convenient option because it works automatically over Wi-Fi.
Step 1: Connect to Wi-Fi
Make sure your iPhone is connected to a stable Wi-Fi network.
Step 2: Open Settings
Tap:
Settings → [Your Name] → iCloud → iCloud Backup
Step 3: Turn on iCloud Backup
Enable:
Back Up This iPhone
Once enabled, your iPhone will automatically back up when:
- Connected to Wi-Fi
- Plugged into a charger
- Locked
- Sufficient iCloud storage is available
Step 4: Create a Backup Immediately
Tap:
Back Up Now
Wait until the backup completes.
What iCloud Backup Includes
An iCloud backup typically contains:
- Device settings
- App data
- Home screen organization
- Photos (if iCloud Photos is disabled)
- Messages
- Ringtones
- Visual Voicemail
- Apple Watch backups
- Health data (encrypted)
Check Your Last Backup
Go to:
Settings → [Your Name] → iCloud → iCloud Backup
You’ll see the date and time of your most recent successful backup.
Method 2: Back Up Your iPhone on a Mac
If you have a Mac running macOS Catalina or later, Finder replaces iTunes for device backups.
Step 1
Connect your iPhone using a USB or USB-C cable.
Step 2
Open Finder.
Step 3
Select your iPhone from the sidebar.
Step 4
Under General, choose:
Back up all of the data on your iPhone to this Mac
Step 5 (Recommended)
Enable:
Encrypt local backup
Encrypted backups also save:
- Passwords
- Health data
- Wi-Fi settings
- HomeKit information
Create a password you’ll remember.
Step 6
Click:
Back Up Now
Method 3: Back Up Using a Windows PC
Windows users can still create local backups.
Step 1
Install the latest version of Apple Devices (or iTunes on older systems).
Step 2
Connect your iPhone.
Step 3
Open Apple Devices (or iTunes).
Step 4
Select your iPhone.
Step 5
Choose:
Back Up Now
For maximum protection, select:
Encrypt Local Backup
How Much iCloud Storage Do You Need?
Apple provides 5GB of free iCloud storage, but this fills up quickly.
Here are common storage options:
| Storage | Best For |
|---|---|
| 5GB | Very light users |
| 50GB | Most individuals |
| 200GB | Families or heavy photo users |
| 2TB+ | Large photo/video libraries |
If your backup fails, insufficient iCloud storage is often the cause.
How to Back Up Photos Separately
Many people assume iCloud Backup always includes photos.
Actually:
- If iCloud Photos is ON, photos sync separately and are not included in your iCloud Backup.
- If iCloud Photos is OFF, photos are stored inside the backup.
You can also copy photos manually to:
- Mac
- Windows PC
- External SSD
- NAS storage
- Third-party cloud services
How Often Should You Back Up?
A good rule is:
- Automatic iCloud Backup: Daily
- Local computer backup: Before iOS updates
- Local backup: Before upgrading to a new iPhone
- Backup before repairs or battery replacement
What Isn’t Included in an iPhone Backup?
Some items are not stored because they can be downloaded again.
Examples include:
- Apps from the App Store (only app data is backed up)
- Music synced from a computer
- Movies purchased again from Apple
- Data already stored in iCloud
- Apple Pay information
- Face ID and Touch ID settings
How to Restore an iPhone from Backup
When setting up a new or erased iPhone:
- Turn on the device.
- Follow the setup process.
- On the Apps & Data screen, choose one of the following:
- Restore from iCloud Backup
- Restore from Mac or PC
- Sign in with your Apple ID if necessary.
- Select the most recent backup.
- Wait for the restoration to complete.
Depending on the size of the backup and your internet speed, the process may take anywhere from several minutes to a few hours.
Tips for Keeping Your Backups Safe
- Enable automatic iCloud backups.
- Use encrypted local backups to preserve sensitive data.
- Check your last backup regularly to ensure it completed successfully.
- Keep enough free iCloud storage available.
- Back up before installing beta software or major iOS updates.
- Maintain at least one local backup in addition to your cloud backup for extra protection.
Final Thoughts
Backing up your iPhone is one of the easiest ways to prevent permanent data loss. Whether you prefer the convenience of iCloud or the added control of local backups on a Mac or Windows PC, creating regular backups ensures your important photos, messages, contacts, and apps remain safe.
For the best protection, consider using both methods: enable automatic iCloud Backup for everyday security and create an encrypted local backup before major software updates, repairs, or upgrading to a new iPhone. This combination provides the most reliable safety net, ensuring your data is always ready to restore whenever you need it.