


Setting up a wireless router in 2026 may seem like a daunting task for beginners, but with the right guidance, it’s a straightforward process that will give you fast and reliable internet throughout your home or office. Whether you’re setting up your router for the first time or replacing an old one, this step-by-step guide will walk you through everything you need to know to get your Wi-Fi network up and running.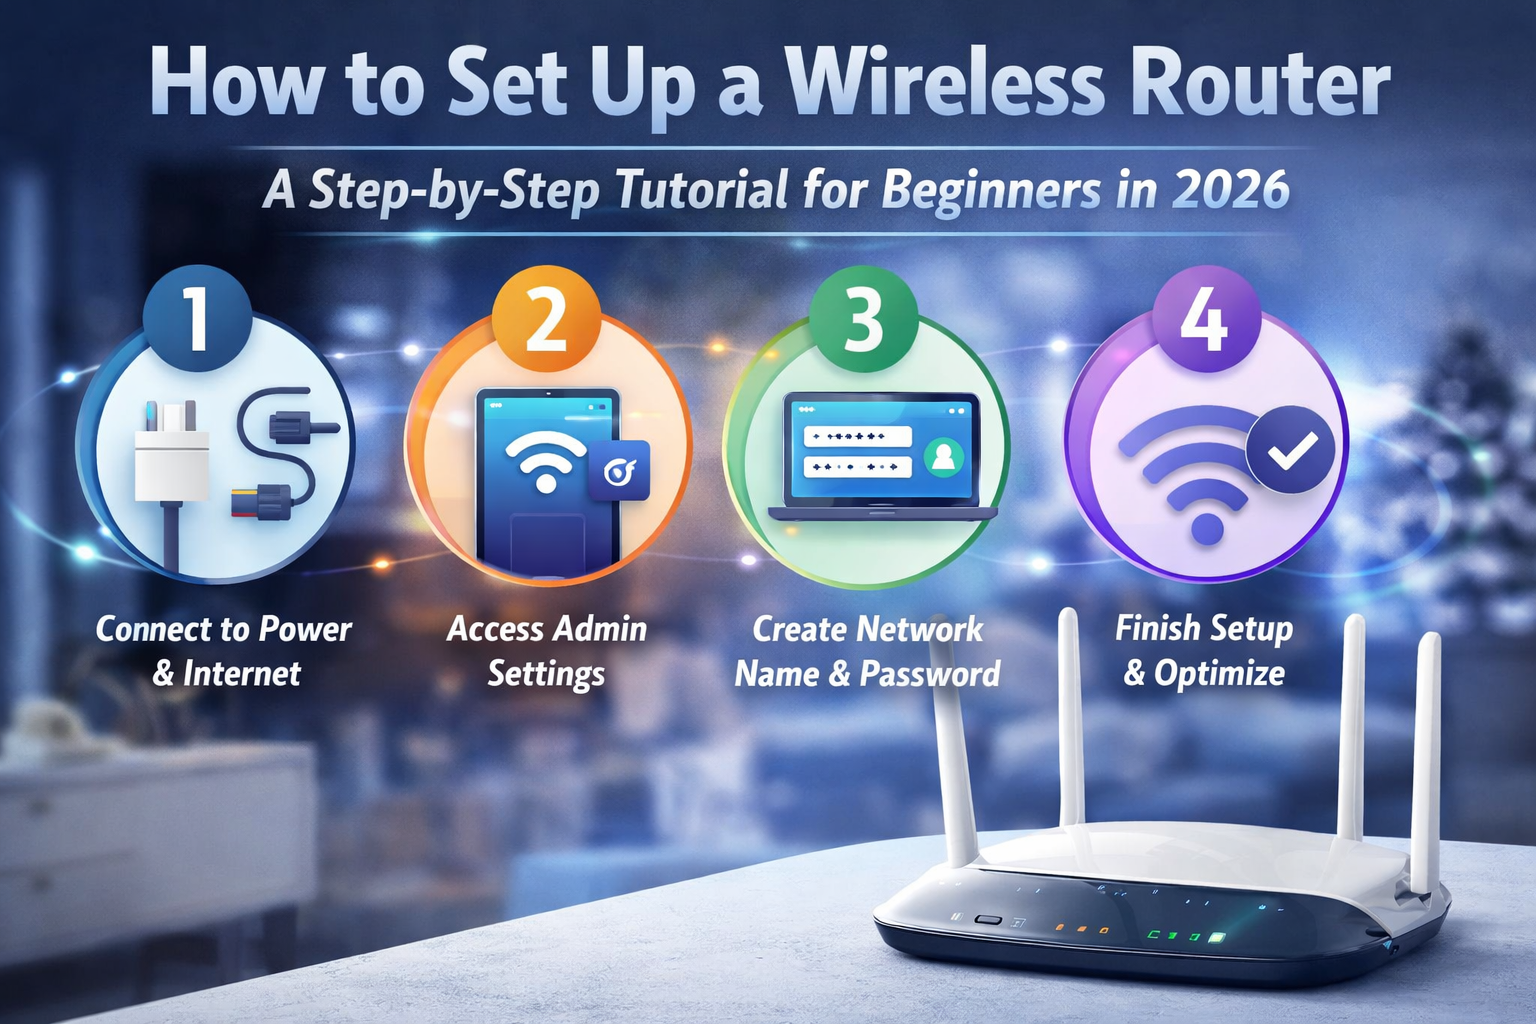
In this tutorial, we’ll explain how to connect the hardware, access your router settings, configure Wi-Fi preferences, and secure your network. Let’s dive in!
Step 1: Unbox and Prepare the Router
Before you begin, ensure you have everything you need:
- Router (new or replacement)
- Power Adapter
- Ethernet Cable (typically provided)
- Internet Service (usually a modem)
- A Computer or Mobile Device for configuration
Unboxing your router will reveal several ports and cables. Take a look at the following key components:
- Power Port: For plugging in the power adapter.
- WAN (Wide Area Network) Port: Typically used to connect your router to the modem.
- LAN (Local Area Network) Ports: These are for connecting wired devices (like desktop PCs).
- Reset Button: Used if you need to reset the router to its factory settings.
- Wi-Fi antennas (for routers with external antennas).
Step 2: Connect the Router to the Modem
To start, connect your router to the modem using the Ethernet cable. The modem is typically provided by your internet service provider (ISP) and connects to the internet. Here’s how to connect everything:
- Plug the Ethernet cable into the WAN port of the router.
- Insert the other end of the cable into the Ethernet port of the modem.
- Plug the power adapter into the router and plug it into an electrical outlet.
At this point, your router should be receiving power, and the internet connection should be established via the modem. The WAN port light on the router should be blinking or solid, indicating a successful connection.
Step 3: Power Up and Connect to the Router
- Turn on your router by pressing the power button if it has one. Wait a couple of minutes for the router to initialize.
- On your computer, smartphone, or tablet, search for the Wi-Fi network broadcasted by your router. Look for a name (SSID) provided on the router’s packaging or label (often something like “HomeNetwork” or “Router-XYZ”).
- Connect to the Wi-Fi network by selecting it and entering the default password (which should also be on the router label or included in the manual). The default Wi-Fi credentials are typically something like:
- SSID (Network Name)
- Password/Key
Step 4: Access the Router Settings
Now, you need to log in to the router’s administrative settings to customize your Wi-Fi network. Here’s how to do it:
-
Open a web browser (like Chrome, Firefox, or Safari) and enter the router’s IP address into the address bar. Common router IP addresses are:
- 192.168.1.1
- 192.168.0.1
- 192.168.100.1
You can find the exact IP address in the router’s manual or on the label. Hit Enter.
-
A login page will appear. Enter the username and password. By default, these are often:
- Username: admin
- Password: admin or password
If the default credentials don’t work, check the router’s label or manual for the correct details.
Step 5: Configure Your Wi-Fi Settings
Once logged into the router settings, follow these steps to personalize your Wi-Fi network:
- Change the Wi-Fi Name (SSID): This is the name of your network. It’s a good idea to change it to something unique but easily recognizable (e.g., “John’s Network” or “Home Wi-Fi”).
- Look for the section labeled Wi-Fi Settings or Wireless Settings.
- Enter a new SSID (network name).
- Set a Strong Wi-Fi Password: Change the default Wi-Fi password to something secure. Aim for at least 12 characters, using a mix of uppercase letters, lowercase letters, numbers, and special characters. You’ll find this option in the Wi-Fi or Security settings section.
- Select the Wi-Fi Band (2.4GHz or 5GHz):
- 2.4GHz: This band provides greater coverage but is slower and more crowded (lots of devices use this band).
- 5GHz: This band offers faster speeds but covers a smaller range and may be affected by obstacles like walls.
- Enable WPA3 Security: In the security settings section, choose WPA3 if your router supports it. This is the latest and most secure encryption method for wireless networks. If WPA3 isn’t available, select WPA2.
Step 6: Set Up Additional Features (Optional)
Many modern routers offer additional features that can enhance your network experience:
- Guest Network: If you want to allow guests to connect to the internet without giving them access to your private network, enable a Guest Network. You can create a separate SSID and password for them.
- Parental Controls: If you have children, consider setting up parental controls to limit access to certain websites or set screen time limits.
- Quality of Service (QoS): Some routers allow you to prioritize certain devices or services (like streaming or gaming) for a better experience.
Step 7: Save and Restart the Router
Once you’ve made your changes, save the settings, and then restart the router to ensure everything applies correctly. You may be prompted to log out and reconnect to the Wi-Fi network with your new settings.
Step 8: Test Your Connection
After restarting, test your internet connection by browsing the web or running a speed test. If everything is working as expected, you’re good to go!
Troubleshooting Tips
If you’re having trouble, try these steps:
- Check the cables: Ensure the Ethernet cable between the modem and router is securely connected.
- Restart the modem and router: Unplug both devices for 30 seconds and then plug them back in.
- Factory reset the router: If you’re unable to access the router settings, locate the reset button on the router, press it for about 10 seconds, and start over with the default credentials.
Conclusion
Setting up your wireless router doesn’t have to be complicated. By following these simple steps, you can have your Wi-Fi network up and running in no time. Whether you’re looking to connect a few devices or support a smart home, configuring your router properly is the first step to enjoying fast, secure, and reliable internet.