


Laptop keyboards are essential tools for productivity, gaming, and communication—but even in 2026, keyboard failures remain one of the most common hardware issues. From unresponsive keys to erratic behavior, understanding the causes and solutions is crucial for keeping your laptop in top shape. This guide walks you through the most common keyboard problems and the steps to repair or troubleshoot them effectively.
Common Causes of Laptop Keyboard Failures
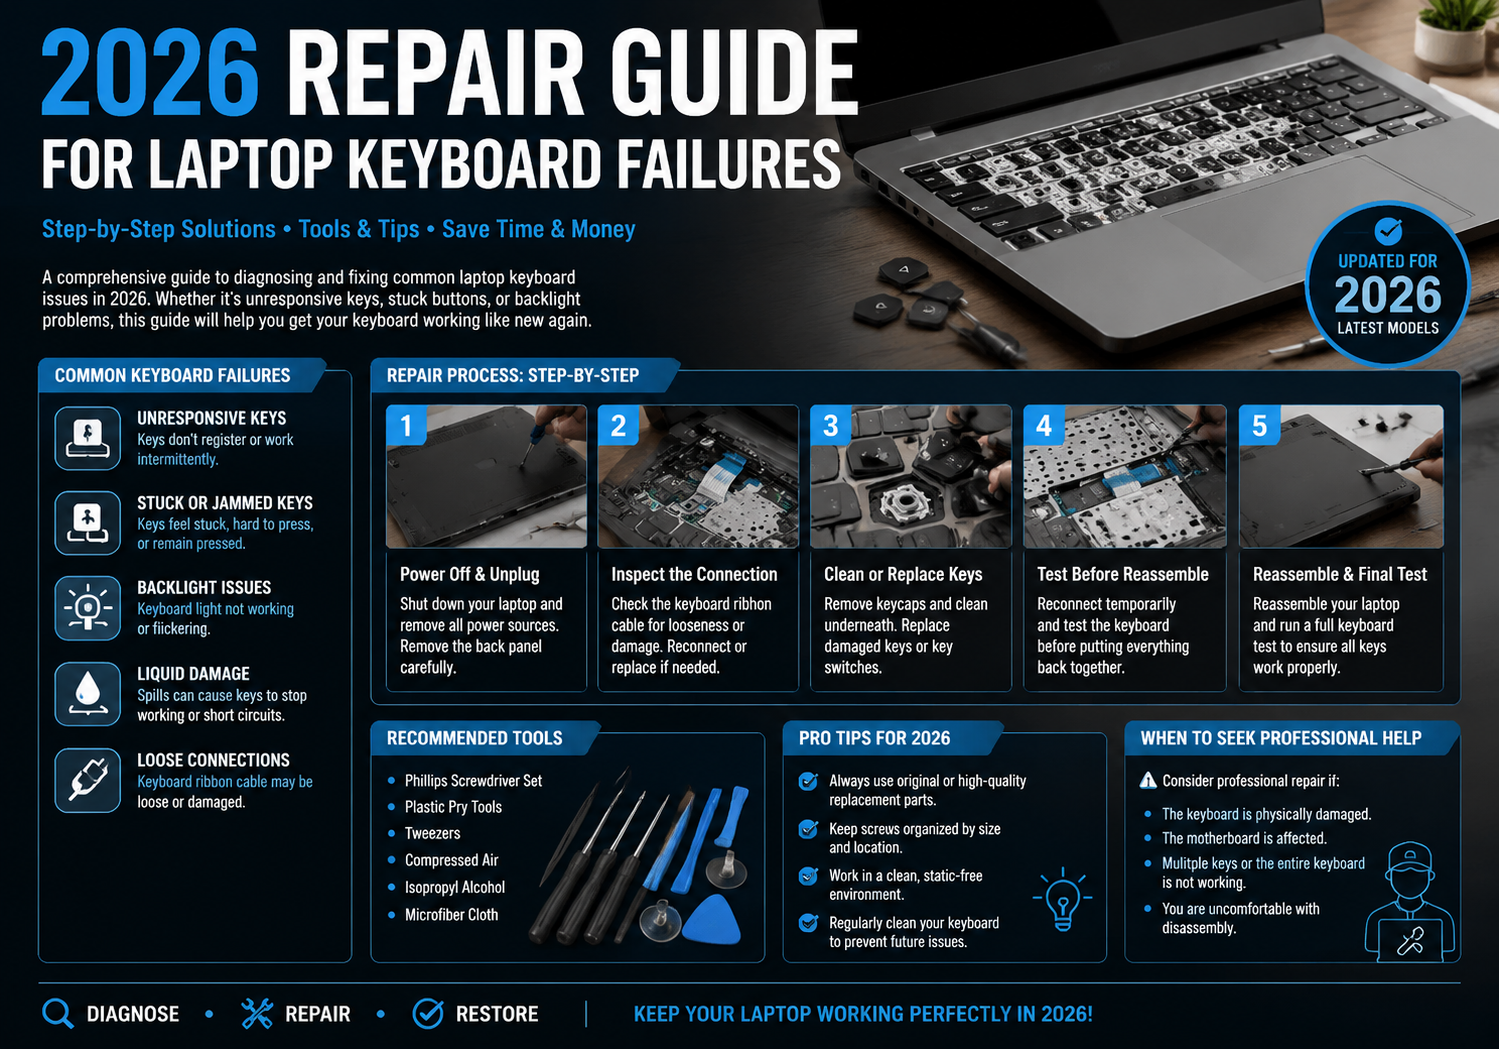
- Physical Damage – Spills, drops, or debris can damage keys or the internal membrane. Sticky or stuck keys are often caused by crumbs or liquid infiltration.
- Driver or Software Issues – Outdated or corrupted keyboard drivers, OS updates, or system glitches can make your keyboard unresponsive.
- Connection Problems – In laptops, the keyboard connects to the motherboard via a flexible ribbon cable. Loose or damaged connections often result in partial or total keyboard failure.
- Wear and Tear – Frequent use can wear out the contacts beneath keys, leading to inconsistent response or total failure of certain keys.
Step 1: Preliminary Troubleshooting
Before opening your laptop, perform these quick checks:
- Restart Your Laptop: Sometimes, a simple reboot fixes temporary software glitches.
- Check Keyboard Settings: Ensure the correct language layout is selected and sticky keys are disabled.
- External Keyboard Test: Plug in a USB or Bluetooth keyboard. If it works, the problem is likely hardware-related on your laptop.
- Run a Diagnostic Tool: Most modern laptops include built-in hardware diagnostics that can detect keyboard issues.
Step 2: Cleaning and Maintenance
Many keyboard failures result from dust, debris, or liquid spills:
- Compressed Air: Blow out dust under the keys.
- Keycap Removal: If your model allows, carefully remove keycaps and clean with isopropyl alcohol and a soft brush.
- Spill Response: Immediately power off the laptop and unplug it. Let it dry completely before attempting to power it back on.
Step 3: Driver and Software Solutions
Keyboard issues can often be resolved through software:
- Update Drivers: Visit your laptop manufacturer’s website and download the latest keyboard drivers.
- Uninstall & Reinstall: Remove the keyboard driver in Device Manager and restart your laptop to reinstall it automatically.
- OS Updates: Ensure your operating system is up-to-date, as patches may fix compatibility issues.
Step 4: Hardware Repairs
For persistent issues, hardware repair may be necessary:
- Check Ribbon Cable: Carefully open the laptop (following manufacturer guidelines) and inspect the keyboard ribbon cable. Reseating the cable often resolves intermittent failures.
- Replace the Keyboard: If individual keys or the entire keyboard is non-functional, replacing the keyboard is often the most reliable solution. Replacement kits are widely available for most modern laptops.
- Professional Repair: If your laptop is under warranty or you’re uncomfortable with DIY repairs, certified repair technicians can safely replace or repair the keyboard.
Step 5: Preventive Measures
To avoid future keyboard failures:
- Use a Keyboard Cover: Protect against spills and debris.
- Keep Liquids Away: Even small spills can cause damage over time.
- Regular Cleaning: Monthly dusting and gentle cleaning prolong the keyboard’s lifespan.
- External Keyboard for Heavy Typing: For gaming or long typing sessions, an external keyboard reduces wear on the laptop’s built-in keyboard.
Final Thoughts
Laptop keyboard failures are frustrating, but with the right troubleshooting and repair strategies, most issues can be resolved without costly replacements. By combining careful maintenance, software checks, and timely hardware intervention, you can extend the life of your laptop and maintain peak productivity in 2026 and beyond.