










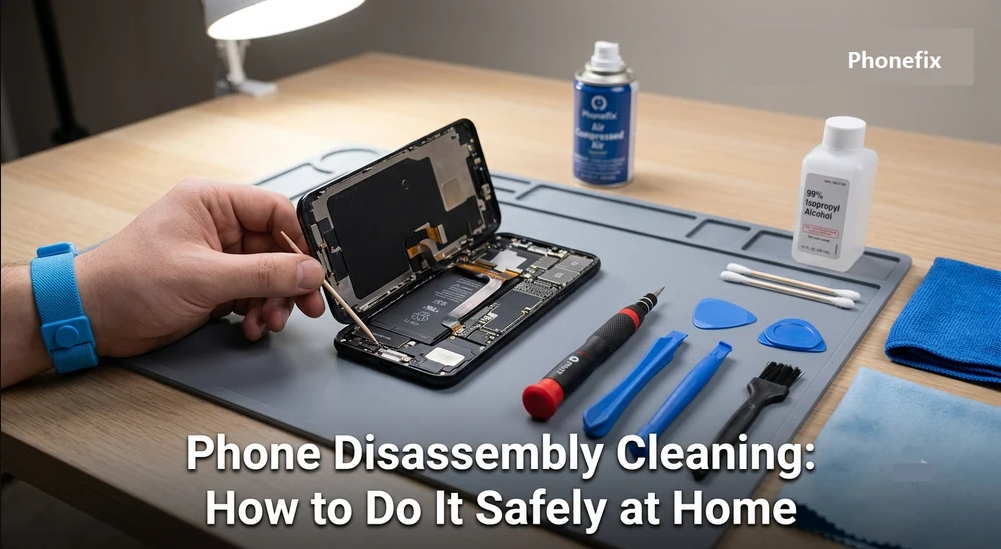
Dust, pocket lint, and everyday debris have a way of finding their way into a smartphone. Charging ports, speaker openings, microphones, buttons, and the gaps around the display are especially vulnerable. While wiping the outside of your phone regularly can prevent some buildup, dirt that settles inside the device may eventually affect charging, sound quality, buttons, or overall performance.
Cleaning the inside of a phone can help solve these problems, but opening a smartphone is not something to rush. Modern devices contain delicate cables, connectors, batteries, cameras, and tightly packed components. With the right preparation, suitable tools, and a careful approach, however, basic disassembly and cleaning can be done safely.
Why Internal Phone Cleaning Is Important
Accumulated dirt can cause more than cosmetic problems. Compressed lint inside a charging port may prevent a cable from making proper contact, while dust around speakers and microphones can make calls or audio sound muffled. Debris around physical buttons can also make them feel stiff or inconsistent.
Internal cleaning can remove this buildup before it develops into a bigger problem. In some cases, a dirty charging port or blocked speaker opening may be responsible for an issue that appears to be a hardware failure.
That does not mean every phone should be opened regularly. Disassembly always carries some risk, particularly with newer smartphones that rely heavily on adhesive and have extremely thin internal cables. If a phone is working normally and only needs basic cleaning, there is usually no reason to take it apart.
Tools You Need Before Starting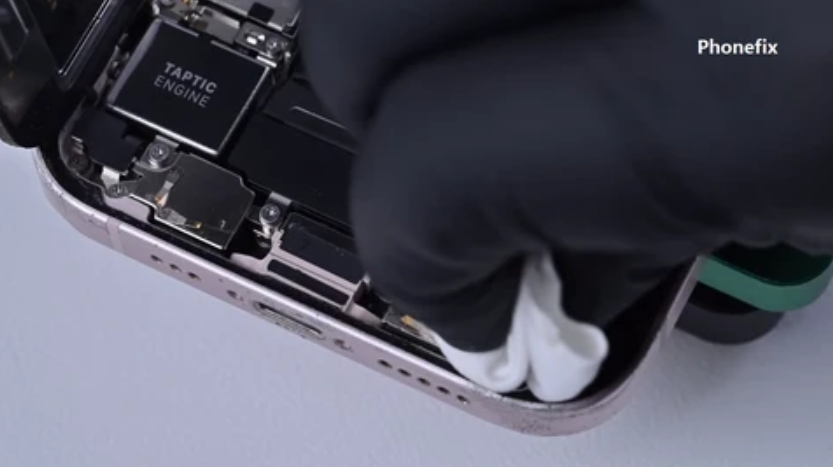
The right tools make a significant difference. Avoid using needles, knives, paper clips, or other metal objects as makeshift repair tools. They can scratch contacts, damage connectors, or accidentally cause an electrical short.
A basic collection of Phone Repair Tools should include:
Opening Tools
- Precision screwdriver set: Smartphones can use Phillips, Pentalobe, Tri-point, and other small screw types, so a selection of precision bits is useful.
- Plastic opening picks or spudgers: These help separate covers and displays while reducing the chance of scratching the frame.
- Suction cup: Useful for lifting certain displays or rear panels after the adhesive has been loosened.
Cleaning Tools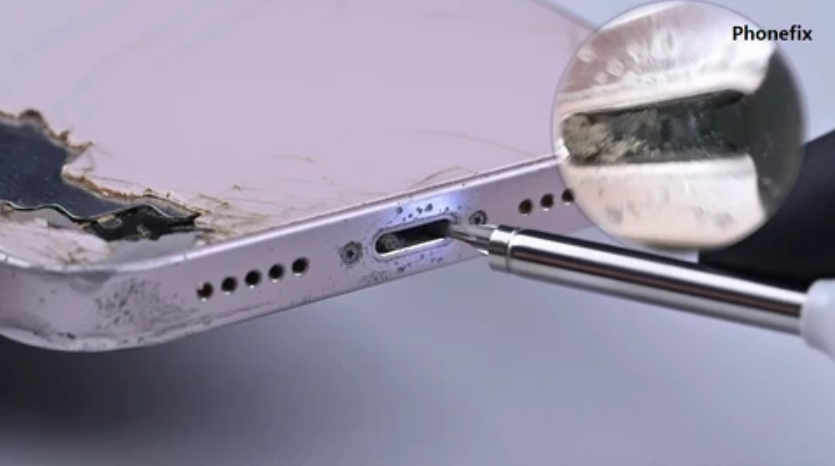
- ESD-safe brush: A soft anti-static brush is suitable for removing loose dust from circuit boards and connectors.
- Compressed air: Short bursts can remove loose particles from ports and gaps. Keep the can upright and avoid excessive pressure.
- 90% or higher isopropyl alcohol: Useful for removing certain residues from appropriate internal components. Apply it sparingly rather than pouring it onto the phone.
- Microfiber cloth: Ideal for cleaning the exterior without leaving scratches or lint.
Additional Items
Wooden or plastic picks can help remove compacted lint from charging ports. ESD-safe tweezers are useful for handling small parts, while a magnetic screw mat keeps different screws organized. A flashlight or magnifying glass can also make it easier to inspect small areas.
Safety Precautions to Follow
Before opening the phone, take a few basic precautions.
First, turn the phone off completely and disconnect the charger. Remove the SIM tray if necessary. Never work inside a powered device unless the manufacturer’s repair procedure specifically requires it.
Static electricity is another concern. Work on a clean, dry surface and avoid carpeted areas when possible. An ESD mat and wrist strap provide additional protection when handling sensitive electronics.
Keep every screw organized. Two screws may appear identical but have different lengths, and installing a longer screw in the wrong location can damage internal components.
Most importantly, never force a component apart. If a display or back panel refuses to move, stop and check for hidden screws, clips, or adhesive. Excessive force can crack the glass or tear a ribbon cable.
Liquid should also be kept under control. Never spray cleaning fluid directly onto the phone. If isopropyl alcohol is needed, apply a small amount to an appropriate cleaning tool and allow the area to dry completely.
Step-by-Step Guide to Cleaning a Phone
Step 1: Prepare the Phone and Workspace
Start by powering down the smartphone. Remove its case, SIM tray, and any other easily removable accessories.
Choose a flat, well-lit workspace and place an anti-static mat or clean cloth underneath the phone. Arrange your screwdrivers, opening picks, cleaning brush, and other tools nearby so you do not have to search for them during the repair.
Step 2: Carefully Open the Device
The exact opening procedure depends on the phone model. Some devices require screws to be removed first, while others use strong adhesive around the display or rear cover.
If adhesive is involved, use the appropriate opening method for that model. A suction cup can help create a small gap, after which a plastic pick can be worked slowly around the edges.
Do not push the opening pick deeply into the phone. Display and battery cables can sit very close to the frame, and a few millimeters of unnecessary movement can cause serious damage.
As each screw comes out, place it in a magnetic mat or another organized location.
Step 3: Disconnect the Battery
Once the phone is open, locate the battery connector before cleaning internal components.
Use a plastic spudger or suitable ESD-safe tool to disconnect the battery carefully. This removes power from the main circuitry and significantly reduces the chance of creating a short while working inside the device.
Avoid pulling directly on cables. Always work from the connector itself.
Step 4: Inspect and Remove Internal Dust
Take a close look at the motherboard, connectors, battery area, and other accessible sections.
Use a soft anti-static brush to loosen dust and debris. Gentle movements are enough; there is no benefit to aggressively scrubbing the circuit board.
For stubborn residue, a small amount of high-concentration isopropyl alcohol can be used with an appropriate cleaning swab or brush. Apply it sparingly and give the area enough time to dry before reconnecting power.
Pay particular attention to cable connectors. Dust or residue around these areas can sometimes contribute to intermittent problems.
Step 5: Clean the Charging Port
Charging ports are among the easiest places for pocket lint to accumulate. Each time a cable is inserted, loose debris can become compressed deeper inside the connector.
Use a flashlight to inspect the port first. Hold the phone so the opening faces downward and use gentle, short bursts of compressed air to remove loose material.
If compacted lint remains, use a wooden or plastic pick to carefully work along the sides of the port. Avoid pushing directly against the center or applying force to the connector pins.
Never use a metal needle or pin inside the charging port. Once the debris has been loosened, use another short burst of air and inspect the port again.
Step 6: Clean the Speakers and Microphones
Speaker grilles and microphone openings can collect fine dust over time. Use a dry, soft-bristled brush and gently sweep across the surface.
Avoid pushing the brush deep into the openings. You can also use short bursts of compressed air from a safe distance, but strong airflow directly into a microphone or speaker should be avoided.
For surface-level debris, low-tack tape can sometimes lift particles without introducing moisture or leaving significant residue.
Step 7: Put Everything Back Together
After cleaning, check that the inside of the phone is completely dry and that no loose debris remains.
Reconnect the battery and any other cables that were disconnected. Make sure each connector is properly aligned and seated before applying pressure.
Carefully reinstall the display or back cover. If the original adhesive is no longer reliable, it may need to be replaced with the correct adhesive for that model.
Return every screw to its original position and tighten it only until secure. Excessive force can damage threads, crack plastic, or place unnecessary pressure on the frame.
Before completely sealing the device, power it on and test the important functions. Check charging, touchscreen response, speakers, microphones, cameras, buttons, and other features that may have been affected during disassembly.
Frequently Asked Questions
How often should a phone be cleaned internally?
There is no universal schedule. Phones used in dusty environments may require more attention, while a normally used device may only need occasional external cleaning. If there are no symptoms or visible internal debris, routine disassembly is generally unnecessary.
Can I clean internal phone components with water?
No. Water can cause corrosion and electrical problems. For appropriate internal cleaning tasks, high-concentration isopropyl alcohol is generally preferred because it evaporates quickly. It should still be used sparingly and only where appropriate for the component.
What happens if I tear a ribbon cable?
A damaged ribbon cable can cause the connected component to stop working. Depending on the phone, replacing it may be relatively straightforward or may require specialized repair equipment. The safest approach is to avoid pulling, twisting, or bending cables unnecessarily during disassembly.
Should I open my phone just because it has some dust?
Usually not. Minor surface dust can often be removed without opening the device. Disassembly makes more sense when debris is causing a specific problem, such as a blocked charging port or persistent buildup that cannot be safely removed externally.
Verdict
Cleaning a smartphone internally can be worthwhile when dust and debris begin affecting everyday functions, but the process should never be rushed. The combination of delicate ribbon cables, small connectors, adhesive, and a built-in battery leaves little room for careless handling.
Work slowly, use the correct tools, keep screws organized, and disconnect the battery before handling internal circuitry. If opening the phone feels beyond your experience, professional repair is the safer option.
For those who decide to handle basic maintenance themselves, having a reliable set of Phone Repair Tools makes the job much easier. The right equipment not only improves precision but also reduces the risk of turning a simple cleaning task into an expensive repair.
Read Also: How to Enable Quick Startup on Redmi Note 13 Pro Smartphone?